If you’re a beginner WordPress user, then you need to start by learning how to install plugins. This article will teach you the steps needed to install a WordPress plugin.
If you are using WordPress, then you probably know that plugins are very helpful to make a good website. Plugin installation is one of the most important tasks that a WordPress site administrator must do. And there are many different plugin types to choose from.
Table of contents
What is WordPress?
WordPress is a free and open-source blogging platform. And you can start blogging on WordPress. Its strength lies in its simplicity and ease of use. That makes it one of the most popular platforms available today. WordPress powers over 30% of all websites on the Internet, including this one.
WordPress can be installed quickly and easily using just a few simple steps:
- Install WordPress by downloading it from their website (https://wordpress.org/). After you’ve downloaded it, run your installer. And follow the instructions to complete the installation of your new site or update existing sites.
What is WordPress Plugin?
WordPress plugins are add-ons of software to add additional functionality to your WordPress site. Plugins are not required for WordPress to work. But they can be very helpful if you want to add extra features or change how your site looks.
Most people think of plugins as being used within the WordPress dashboard. But they don’t have to be installed there — you can install them anywhere on your web host! The best part about installing a plugin? You don’t need any technical knowledge or experience with coding. You only need some patience and an internet connection. (Though if it helps, we recommend reading through our guide first).
To secure your WordPress site. Look into WordPress Firewall Plugins to protect your site from attacks.
Install the plugin from the WordPress admin Dashboard plugin section:
There are different methods to install any plugin or WordPress theme. The most common way to do so is by using the WordPress admin dashboard. To do this, follow these steps:
The first step is to connect to the WordPress admin dashboard. Open your web admin dashboard URL in the browser and go to [your website/admin dash link].
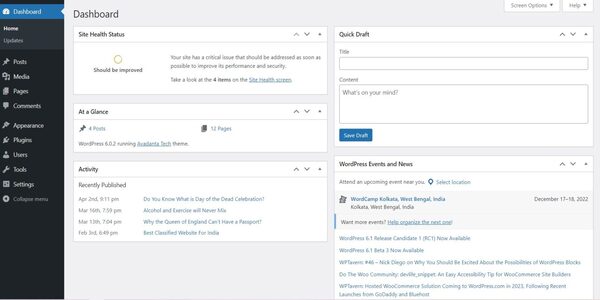
Step 1: Search in Plugins Section:
Now, when you search for a plugin in the Plugins section. You will be able to see all the plugins that are available and ready to install.
To do so, follow these steps:
- Go to the Plugins-> Add New.
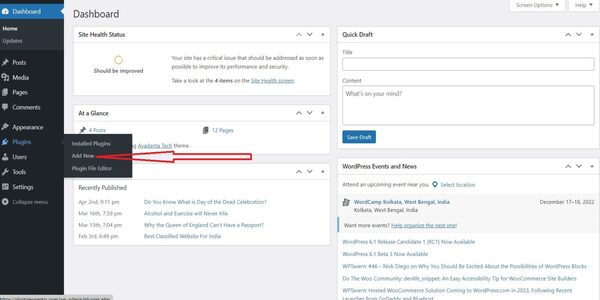
- Now on this screen, searching by keyword or author is one of the most popular ways of finding a plugin.
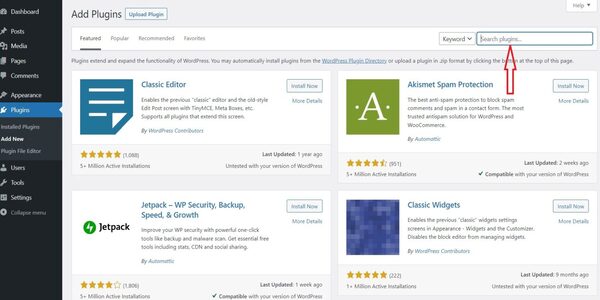
For example: if we want to install an article editor plugin. Then we can’t just type “article” into Google and get results. Because there are thousands of article editors out there. Instead, we need to search for each specific editor by its name or description (e.g., Gutenberg). We can also use these keywords as filters when searching. So that only results matching our criteria appear on our page!
Step 2: Install Plugin
Once you search for any required plugin and find it. Now, you can install the plugin by following these steps:
- Click on the Install Now button.
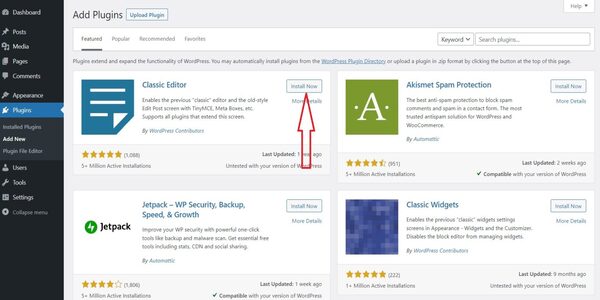
Once your plugin is installed, you can see the activate button. Now move to the next step.
Step 3: Activate Plugin
Once you’ve added your plugin, click on the Activate Plugin link in the confirmation box that pops up.
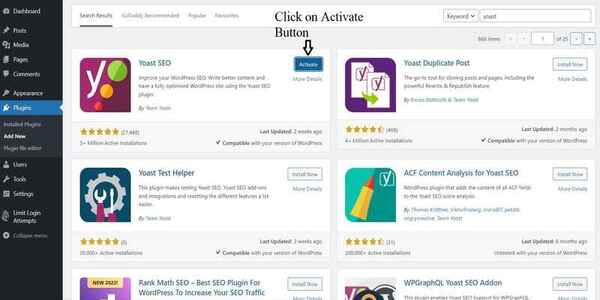
This will take you to your WordPress admin. And it should show that your plugin is now activated.
Conclusion
In conclusion, before beginning to install a WordPress plugin. It is important to understand the basic steps involved. By following the above steps, you can install and use the plugin successfully.
We hope our tutorial helped you install plugins on your WordPress site. If not, then follow our other tutorials and learn.
Related Topics
- WordPress Search Plugins
- SMTP WordPress Plugins
- WordPress Page Builders
- Common WordPress Errors
- Elementor Alternatives
- WordPress Poll plugins
- What is slug? (URL)
- WordPress BackUp Plugins
- WordPress Cache Plugins
- Best WordPress Popup Plugins
- What is the Cost of Developing a WordPress Website?
I have read your blog carefully, and you have given good information.
Amazing content with complete details.